Wednesday, January 25, 2017

Seeds: What Do All These Terms Mean?

What Do All These Terms Mean?
When it comes to vegetable seeds and plants, there are a few terms that get used a lot: open-pollinated, heirloom, hybrid, organic and genetically modified. They all sound important, but what do they really mean? Here’s a quick explanation.

Open-pollinated – First, an explanation of pollination. Pollination is the process that plants use to reproduce. Pollen from the flower of one plant gets transferred to the flower of another plant and seeds are formed. This transfer of pollen typically occurs by insects, animals or wind. In this process, the genetic information of one parent (the producer of the pollen) gets blended with the genetic information of the other parent (the recipient of the pollen) and a similar, but genetically different offspring is the result in seed that is formed. This mixing of genetic information is a natural process and allows for the diversity that we naturally find within a plant species.

When it comes to the vegetables grow, open-pollinated varieties refer to unique breeding lines within a species. These breeding lines develop over time. Crops are planted and weak plants or those that don’t display characteristics that resemble the others are eliminated. The remaining plants are allowed to pollinate openly with each other, seed is collected and then saved. The next year the same thing happens and again and again, year after year. Eventually through this repetitive process, the natural variation within this variety begins to disappear and the blood-line becomes more stable, but since it is still open-pollinated, it still containing some genetic diversity which is good. In a true open-pollinated variety, seed saved from one crop can be used to plant a new one and the new one will have the same genetic characteristics as the parent crop. Open-pollinated varieties only remain genetically true only if they are not allowed to cross with other varieties. 

Heirloom – These are open-pollinated varieties that have been around for a long time, 50 to 100 years or even more. These breeding lines have been typically been passed down within a family or community. All heirloom varieties are open-pollinated, but not all open-pollinated varieties are heirlooms…only the real old ones.

Hybrid – All plant varieties are technically hybrids, or the result of the blending of the genetic information (pollen) of two different parents. But when talking about vegetable varieties, the term hybrid usually refers to the offspring of two different species or two distinctly different blood-lines. For example, if two different heirloom varieties are planted side by side and allowed to open-pollinate with each other, the seeds that they produce would be a hybrid, or a blending to the two breeding lines.
Although hybridization can occur naturally, commercially hybridized seed is bred through a controlled process to create the desired results. Parent plants are carefully selected based on plant characteristics like fruit size or disease resistance and other pollen sources are eliminated, allowing for controlled pollination. If the plant breeder has found the right combination of parents to produce a desirable variety, this new hybrid gets goes into commercial production and hybrid seed is produced. It this hybrid occurs by crossing two true breeding lines, the result is called an F1 hybrid.
It is important to note that although hybrid varieties produce plants with known characteristics, the seeds that they produce will not. Because of the genetic mixing that takes place in your garden when natural pollination is allowed to occur, seeds produced from a commercial hybrid that you have planted will not come true to type. Therefore, replanting of this variety from year to year requires the purchase of new seed from the supplier who does the hybridizing.

Genetically Modified – For this plant discussion, genetically modified organisms, or GMOs, are plant varieties that have been created in the laboratory by introducing very specific genes into the genetic material of the new variety. These genes would not typically cross into the plant naturally and may come from vastly different organisms.
GMOs have been around since the 1980’s and are now widely found in commercially grown crops like corn, soybeans and cotton. It is expensive technology and the GMO varieties and the genetics they contain are tightly controlled by the companies that own them. While there is a lot of controversy surrounding them, it is important to note that they are only available to commercial farmers under very specific contractual controls. GMO seeds are not available to homeowners in retail stores.

Organic – Seed that is labeled organic has been produced through organic gardening practices. When growing vegetables, organic usually means producing crops without the use of commercial pesticides and fertilizers.

Many gardeners choose to grow their crops organically or as organically as they can. Some of those folks feel that to truly grow organically, the seeds that are planted must also be produced organically. Others disagree, feeling that as long as the crop is grown organically, it doesn’t matter how the seed was grown. Unless you are planning on growing commercially and achieving an Organic Certification for your garden, the choice is yours.      
Hopefully that helps. If you find still find yourself confused by all the terminology, come on out and ask us your questions. We’ll try to help clear things up.                                                                                                               

Tuesday, August 23, 2016

It’s Time to Plant Some Grass!


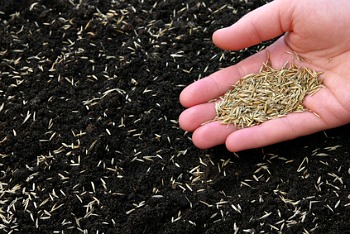
In previous issues we talked about getting the yard ready for seeding and picking out the right grass seed for the project. Now it is time to get it planted!
Fall is the best time of the year for planting tall fescue lawns. Grass seed planted from now through mid-October has plenty of time to get established before winter. Fall planting also give new grass plants as much time as possible to grow and establish before next summer’s heat and dry weather.
Getting new grass seed to grow successfully in your yard really isn’t that difficult if you pay attention to some important details.
1)    Calculate the right amount of seed and spread uniformly.
2)    Lightly incorporate the seed into the upper surface of the soil.
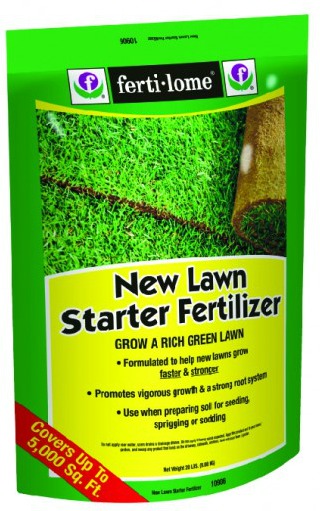
3)    Apply a good starter fertilizer. We always use Fertilome New Lawn Starter.
4)    Keep the new seed bed evenly moist.
5)    Prepare to enjoy great results!
Now let’s look at each of those steps in a little more detail.
How much seed do you need? The answer to this question starts with a quick measurement of the yard. Pull out the tape measurer, step it off, look at site plans, just do whatever it takes to get a pretty good idea of your square footage. Once you have that number, it’s time to do some math.
Our Premium Tall Fescue Blend should be seeding at a rate of 6-8 pounds of seed for every 1,000 square feet. If you are overseeding into an existing lawn, cut that rate in half (3-4 lbs./1,000 sq. ft.).

This rate is important. It will give you a stand that is dense enough to give good coverage but not so crowded that individual grass plants will struggle from competition. If you seed at a lighter rate, you will notice that your lawn is thin, clumpy and more prone to weeds. Conversely, lawns seeded at higher rates might look great this fall but will struggle and often fail due to overcrowding as they head into the stresses of next summer. So do the math...it’s important. If you need help with it, let us know.
Once you know your square footage, you can easily calculate the amount of grass seed needed. Using that amount of seed, and only that amount, spread it uniformly over your area. A broadcast spreader works best for this. If you don’t have one, we sell them and we rent them just for these kinds of projects. The spreader setting isn’t all that important, just set it high enough that seed is coming out, but low enough that it isn’t coming out too fast. Your goal should be to make 2-3 complete passes over the yard, making each pass in a different direction, before running out of seed. Applying a little bit of seed on multiple passes ensures that you are getting your seed spread out evenly, kind of like putting on several light coats of paint instead of one heavy one.
Feed the seed. Starter fertilizers are used to make sure newly developing grass plants have the nutrients they need to support rapid development and good roots. We use Fertilome New Lawn Starter. You should use this any time you are planting grass seed or installing sod to your lawn. It should be applied at the same time the seed goes down or in the case of sod, before the sod is rolled out. This ensures that vital plant nutrients are readily available as soon as the first root tips emerge from the new seed. If you have done the math to figure out how much seed you will need, figuring out how much starter fertilizer will easy. We have different sized bags for different sized areas and will help you get the right amount of starter fertilizer for your project.
Apply it in the same way you did with the seed, several light applications over multiple passes to ensure even distribution using only the required amount of fertilizer based on your square footage calculations.
Incorporate the seed. Grass seed needs to be incorporated into the upper surface of the soil. This helps keep the seeds moist in between waterings and projects newly emerging roots. When seeding bare ground, lightly rake seed in, trying not to cover it with more than about ¼” of an inch of soil. If overseeding an existing lawn, use overseeding equipment like a verti-slicer, power rake or core aerating machine. You can find them at most rental companies. These will help provide good seed/soil contact without destroying the existing stand of grass.
Now add water. When grass seed soaks up water, the germination process is triggered. As long as the seed stays moist and the newly emerging roots aren’t allowed to dry out (good seed/soil contact) your new grass plants should develop nicely. If things do get too dry during this germination process, the newly developing grass seedling dies. At this point, no amount of water can bring it back to life. So once you start watering...stay with it!
So, how much water is enough? Start every project with a good thorough watering once your seed and fertilizer has been applied. From that point on, just lightly water as needed to keep the soil surface from drying out. Remember, your grass seed should be no more than ¼” deep so short sprayings of water should be sufficient to remoisten soil to that depth. This may mean watering once a day or it may mean watering several times a day. Do whatever it takes but don’t let things dry out. All it takes is one dry afternoon to damage your stand. And remember, if you have done a good job of soaking things up to begin with, only light watering is needed at this point. New tall fescue plants emerge in about a week. Once everything is up, you can slowly reduce watering frequency.
Enjoy your results! Now your new grass is growing and things are looking green again. Continue to water occasionally if needed, soaking more deeply as the plants grow older and roots grow deeper. As soon as your new grass is tall enough to be cut by your normal mower setting (somewhere around 3 ½“ is a good cutting height for tall fescue), start mowing. Within a few cuttings, you will notice your new lawn thickening up and improving in appearance. Keep mowing until winter sets in. In most cases, you can clean up any broadleaf weeds by early November with Fertilome.

Weed-Free Zone and definitely apply Fertilome Winterizer to finish off the fall season around the same time.

If you have question or need any help, please let us know. Good luck!

Wednesday, June 15, 2016

Yellow Nutsedge Control


This yellow-green plant is soon to be making its presence know it lawns throughout the area. It's called Yellow Nutsedge and it's a problem.
As the weather warms up it will be easier to spot. This time of the year, it will shoot up rapidly after mowing, more rapidly than your lawn, leaving the lawn looking unattractive. It is yellow-green color makes it easy to identify, and if you inspect closely, you will see that it has stems that are triangular in cross section...lawn grasses will always by round to flattened in shape.
Nutsedge gets its name from the small "nut-like" tubers it sets underground. These are produced at the ends of underground stems, or rhizomes. These tubers or "nutlets" can sprout immediately, forming a new plant capable of producing more rhizomes and more tubers, or lay dormant for years. Over the course of one growing season, one plant can develop into hundreds of new plants, that combined have the potential to produce nutlets numbering in the thousands. That's why quick control is recommended.
 
Now is the time to start treating. Use Hi-Yield Nutsedge Control and make sure to follow label directions, using Spreader Sticker in with your spray mix. That part is critical. Wait several days after mowing before you treat to make it easier to see the problem areas. That also allows time for more foliage to emerge, increasing the effectiveness of your spray application. You should also wait several days after applying before you mow to give things a chance to move through the plant.
If you've had nutsedge growing in your yard for a while, you will also have a lot of dormant tubers. These dormant tubers provide this persistent weed a chance to redevelop in treated areas. If this happens, reapplication will be necessary. Keep in mind that tubers can lie dormant for several years before sprouting, so eliminating this troublesome weed after it has established itself can take several years of regular treatment. The good news is that if you stick with it, you can get the problem cleaned up.

Tuesday, May 31, 2016

Too Much Moisture!

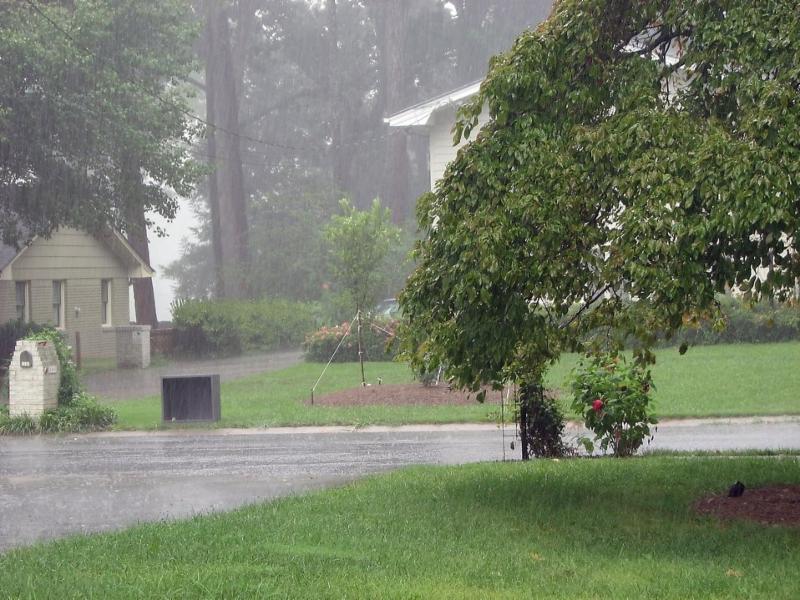
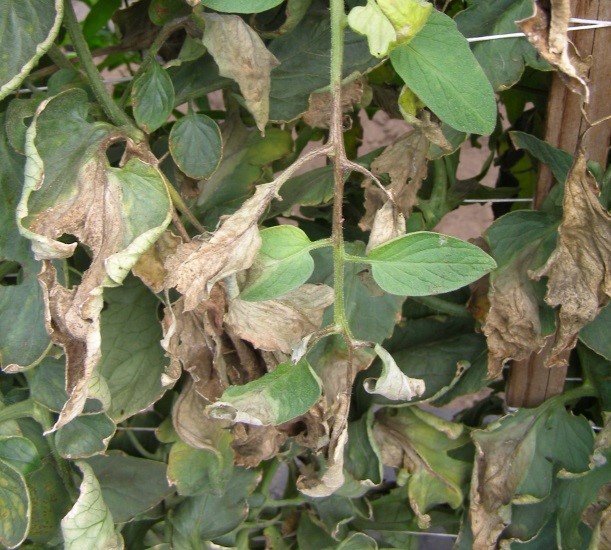
Recent weeks have given us more rain than usual, and unfortunately, just about any time we see excessive periods of rain, we see an increase in disease problems. Some problems are already showing up, others are likely to follow. Quick action is the key to minimizing problems that diseases bring with them. Here are a few tips to help you.
 
Tomatoes - One of the more common complaints about tomato plants is related to leaf diseases. Early Blight and Septoria Leaf Spot are common in our vegetable gardens and often end the tomato season prematurely.
Excessive moisture increases the occurrence of these diseases, so be prepared for some problems. Good disease control practices can help minimize disease problems. Start by making sure you mulch around your tomato plants. Mulching helps control the splashing of soil and the disease spores it contains onto the lower leaves. We like to use wheat straw, pine straw or alfalfa mulch. Preventive fungicides like Fertilome Broad Spectrum Fungicide can also be used.
 
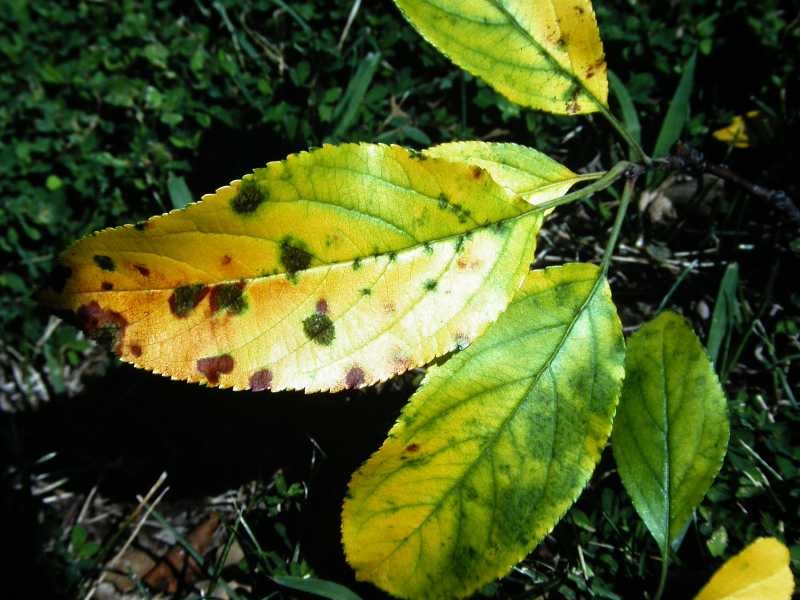
Fruit Trees - If you have done a good job keeping your fruit trees sprayed for leaf and fruit diseases already, don’t stop now! If you haven’t been applying anything, you may need to get started. We have several good disease control products for fruit trees. Keep in mind that not all products work on all fruit tree diseases, so it is important to make sure you are applying the right products to target the disease you’re are trying to control. Let us know what kind of fruit trees you have and we will help you select the right product.
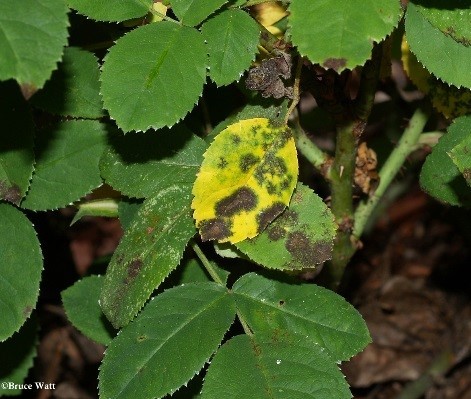
 
Roses - Black Spot and Powdery Mildew samples are already being brought in by customers. To reduce your chances of dealing with these diseases, start by planting your roses in places that receive lots of sun and good air movement.
Planting rose varieties that are naturally resistant to these diseases also helps. If you do find yourself dealing with these problems, fungicides will be needed. We have two by Fertilome that we use that provide good control, Liquid Systemic Fungicide and F-Stop.
 
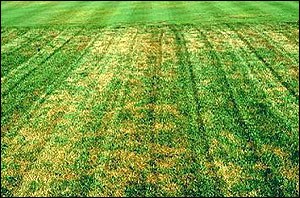
Lawns - Excessive moisture this time of the year often leads into the development of Brown Patch, a disease that creates irregular brown “patches” in tall fescue lawns and in severe cases, kills out areas of turf.
Warmer weather in the upcoming weeks will bring this one on. Although it is very common, most infections will only result in visual damage and eventually the lawn will recover. In years where the disease pressure is higher or in yards that are more prone to disease, prevention may be warranted. Use Fertilome F-Stop and start your applications before the disease gets started. That will be fairly soon. One other recommendation would be to avoiding excessive fertilizer this time of year.
If you have questions about what you are seeing on your plants, let us know. The quicker you identify problems and address them, the less damaging they will be. Bring in samples or email us pictures. We will do our best to get you the information you need and help you make the best decisions possible. You can email pictures and your questions to info@skinnergardenstore.com.

Slugs....Yuck!


As you may have noticed, we are having a very wet spring here in Northeast Kansas. While the yards are greening up and flowers are blooming, you may have also noticed a thriving slug population in your gardens and flower beds. What are these slimy things, and what do I do about them?
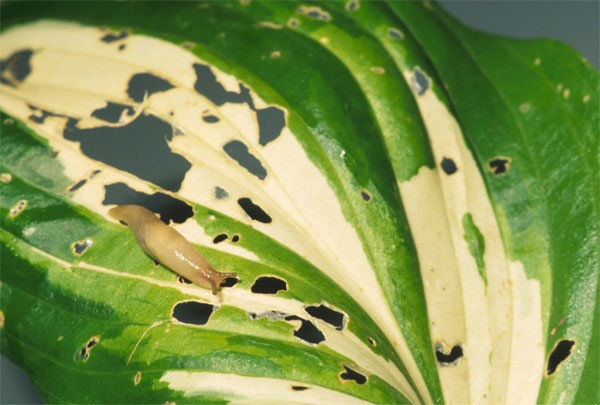
Slugs are mollusks, in the same family as oysters or clams, and are basically snails without a shell. These destructive pests have been known to devour your bulbs, vegetables, annuals, perennials, shrubs and more. One of their favorite snacks seems to be hostas. Thick leafed hostas tend to be a bit more slug resistant than thin leafed. Slugs are nocturnal and have the ability to destroy a seedling overnight. They hang out under mulch, in between boards and under various weeds and debris during the day, and require moisture to move around. This is why we see so many signs of them after a rain or during particularly humid nights. Slugs use a radula, a mouth covered in small teeth, to chew herbaceous plants, fruit on the ground and seedlings. The damage they cause is identifiable by the irregular shaped holes in the leaves they chew on.
There are several options for getting rid of slugs, and a few suggestions for reducing the risk of slug habitation. We offer Hi-Yield Slug and Snail Bait, Sluggo, and Diatomaceous Earth in our garden store. The Slug and Snail Bait temporarily paralyzes the slug until it dries out from the sun.   With Sluggo, the snail takes the bait to its hiding place and within 2-6 days, it dies. It can be used in organic garden, and is safe for use around kids and pets. Diatomaceous Earth is a natural approach to killing slugs. Also known as insect dust, it causes the slugs to dehydrate. Do not breathe it in as it can be harmful to your lungs. Each of these has a different approach to killing slugs, but should have the same results in the end. Some people have also found that collecting slugs and dropping them in soapy water or creating beer traps have also been effective for slug eradication.   On the other hand, watering in the morning as opposed to the evening can create less of an appealing environment for slugs. Also, removing as much debris and potential hiding places for slugs altogether is another approach.

Remember, while slugs will always be something that we have to deal with, there are effective ways to keep them from ruining all of our hard work in our gardens and flower beds. And as in most situations, the earlier we detect their presence, the sooner we can work to limit the damage they do.

Monday, May 16, 2016

Broadleaf Weeds - what do I do?

Broadleaf Weeds in My Lawn...What Do I Do?
Many homeowners find that all the great growth of spring also brings along with it a noticeable growth of weeds in the lawn...weeds that don’t look good and that are choking out the lawn.
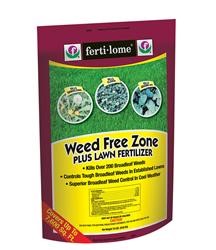
Although the absolute best time to tackle these broadleaf weeds is late in the fall, the next best time to nail them is right now...before they get any bigger! There’s more than one way to go at them, but two of the best approaches with spraying them with Fertilome Weed-Free Zone or treating the yard with a weed and feed combination called Weed-Free Zone Plus Lawn Food. Both contain a highly effective broadleaf weed killer and the weed and feed product has a great fertilizer formulation for late spring applications...like right now!
 
Broadleaf lawn weeds really aren’t that hard to get rid of if you use the right product and you do things right. If you’ve had limited success in the past, give these products a try and if you have any other questions, just let us know!

Growing Great Tomatoes

Growing Great Tomatoes
Mike’s Smart Pot Update
With the warm weather coming a bit sooner this year, many of us have been experiencing Spring Fever for some time now. Most of us have our own theories and rituals as to when the best time to plant certain garden varieties is, and this year, I’m sure some of those have been tested. After watching tomato after tomato, and pepper after pepper leave the store over the past couple of weeks, I finally decided that the time had come to get to planting in my Smart Pots.
I am experimenting with several sizes of Smart Pots this season, and have taken on the challenge of trying a few varieties of vegetables as well. I chose the 5, 10, and 20 gallon size pot, as well as the Big Bag Bed Jr. Raised Bed. After a busy Mother’s Day weekend, I made Monday night my planting night. I love to make salsa every year, so I wanted to incorporate some of the ingredients into my planting plans. I planted four varieties of spicy peppers and some candy onions in the Raised Bed. I also love refrigerator pickles, so I planted a patio cucumber in the 20 gallon pot. My wife is crazy about eggplant, so I planted an oriental express eggplant in the 10 gallon pot. Finally, on a whim, I planted fennel in the 5 gallon sized pot. We have never grown fennel, so it will be a new experience all together.
Nothing tastes as good as food you have grown yourself! I love to grow, share and talk about food with anyone and everyone.   As the pots take off, I will post progress pictures to accompany my experiences. Please feel free to contact me if you have any questions you may have about my experiences or yours with Smart Pots at miker@skinnergardenstore.com. And above all else, have fun!

-Mike Ray