Tuesday, August 23, 2016

It’s Time to Plant Some Grass!


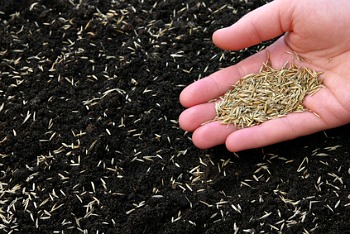
In previous issues we talked about getting the yard ready for seeding and picking out the right grass seed for the project. Now it is time to get it planted!

Fall is the best time of the year for planting tall fescue lawns. Grass seed planted from now through mid-October has plenty of time to get established before winter. Fall planting also give new grass plants as much time as possible to grow and establish before next summer’s heat and dry weather.
Getting new grass seed to grow successfully in your yard really isn’t that difficult if you pay attention to some important details.
1)    Calculate the right amount of seed and spread uniformly.
2)    Lightly incorporate the seed into the upper surface of the soil.
3)    Apply a good starter fertilizer. We always use Fertilome New Lawn Starter.
4)    Keep the new seed bed evenly moist.
5)    Prepare to enjoy great results!
Now let’s look at each of those steps in a little more detail.
How much seed do you need? The answer to this question starts with a quick measurement of the yard. Pull out the tape measurer, step it off, look at site plans, just do whatever it takes to get a pretty good idea of your square footage. Once you have that number, it’s time to do some math.
Our Premium Tall Fescue Blend should be seeding at a rate of 6-8 pounds of seed for every 1,000 square feet. If you are overseeding into an existing lawn, cut that rate in half (3-4 lbs./1,000 sq. ft.).

This rate is important. It will give you a stand that is dense enough to give good coverage but not so crowded that individual grass plants will struggle from competition. If you seed at a lighter rate, you will notice that your lawn is thin, clumpy and more prone to weeds. Conversely, lawns seeded at higher rates might look great this fall but will struggle and often fail due to overcrowding as they head into the stresses of next summer. So do the math...it’s important. If you need help with it, let us know.
Once you know your square footage, you can easily calculate the amount of grass seed needed. Using that amount of seed, and only that amount, spread it uniformly over your area. A broadcast spreader works best for this. If you don’t have one, we sell them and we rent them just for these kinds of projects. The spreader setting isn’t all that important, just set it high enough that seed is coming out, but low enough that it isn’t coming out too fast. Your goal should be to make 2-3 complete passes over the yard, making each pass in a different direction, before running out of seed. Applying a little bit of seed on multiple passes ensures that you are getting your seed spread out evenly, kind of like putting on several light coats of paint instead of one heavy one.

Feed the seed. Starter fertilizers are used to make sure newly developing grass plants have the nutrients they need to support rapid development and good roots. We use Fertilome New Lawn Starter. You should use this any time you are planting grass seed or installing sod to your lawn. It should be applied at the same time the seed goes down or in the case of sod, before the sod is rolled out. This ensures that vital plant nutrients are readily available as soon as the first root tips emerge from the new seed. If you have done the math to figure out how much seed you will need, figuring out how much starter fertilizer will easy. We have different sized bags for different sized areas and will help you get the right amount of starter fertilizer for your project.
Apply it in the same way you did with the seed, several light applications over multiple passes to ensure even distribution using only the required amount of fertilizer based on your square footage calculations.
Incorporate the seed. Grass seed needs to be incorporated into the upper surface of the soil. This helps keep the seeds moist in between waterings and projects newly emerging roots. When seeding bare ground, lightly rake seed in, trying not to cover it with more than about ¼” of an inch of soil. If overseeding an existing lawn, use overseeding equipment like a verti-slicer, power rake or core aerating machine. You can find them at most rental companies. These will help provide good seed/soil contact without destroying the existing stand of grass.
Now add water. When grass seed soaks up water, the germination process is triggered. As long as the seed stays moist and the newly emerging roots aren’t allowed to dry out (good seed/soil contact) your new grass plants should develop nicely. If things do get too dry during this germination process, the newly developing grass seedling dies. At this point, no amount of water can bring it back to life. So once you start watering...stay with it!
So, how much water is enough? Start every project with a good thorough watering once your seed and fertilizer has been applied. From that point on, just lightly water as needed to keep the soil surface from drying out. Remember, your grass seed should be no more than ¼” deep so short sprayings of water should be sufficient to remoisten soil to that depth. This may mean watering once a day or it may mean watering several times a day. Do whatever it takes but don’t let things dry out. All it takes is one dry afternoon to damage your stand. And remember, if you have done a good job of soaking things up to begin with, only light watering is needed at this point. New tall fescue plants emerge in about a week. Once everything is up, you can slowly reduce watering frequency.
Enjoy your results! Now your new grass is growing and things are looking green again. Continue to water occasionally if needed, soaking more deeply as the plants grow older and roots grow deeper. As soon as your new grass is tall enough to be cut by your normal mower setting (somewhere around 3 ½“ is a good cutting height for tall fescue), start mowing. Within a few cuttings, you will notice your new lawn thickening up and improving in appearance. Keep mowing until winter sets in. In most cases, you can clean up any broadleaf weeds by early November with Fertilome.

Weed-Free Zone and definitely apply Fertilome Winterizer to finish off the fall season around the same time.

If you have question or need any help, please let us know. Good luck!

Wednesday, June 15, 2016

Yellow Nutsedge Control


This yellow-green plant is soon to be making its presence know it lawns throughout the area. It's called Yellow Nutsedge and it's a problem.
As the weather warms up it will be easier to spot. This time of the year, it will shoot up rapidly after mowing, more rapidly than your lawn, leaving the lawn looking unattractive. It is yellow-green color makes it easy to identify, and if you inspect closely, you will see that it has stems that are triangular in cross section...lawn grasses will always by round to flattened in shape.
Nutsedge gets its name from the small "nut-like" tubers it sets underground. These are produced at the ends of underground stems, or rhizomes. These tubers or "nutlets" can sprout immediately, forming a new plant capable of producing more rhizomes and more tubers, or lay dormant for years. Over the course of one growing season, one plant can develop into hundreds of new plants, that combined have the potential to produce nutlets numbering in the thousands. That's why quick control is recommended.
 
Now is the time to start treating. Use Hi-Yield Nutsedge Control and make sure to follow label directions, using Spreader Sticker in with your spray mix. That part is critical. Wait several days after mowing before you treat to make it easier to see the problem areas. That also allows time for more foliage to emerge, increasing the effectiveness of your spray application. You should also wait several days after applying before you mow to give things a chance to move through the plant.
If you've had nutsedge growing in your yard for a while, you will also have a lot of dormant tubers. These dormant tubers provide this persistent weed a chance to redevelop in treated areas. If this happens, reapplication will be necessary. Keep in mind that tubers can lie dormant for several years before sprouting, so eliminating this troublesome weed after it has established itself can take several years of regular treatment. The good news is that if you stick with it, you can get the problem cleaned up.

Tuesday, May 31, 2016

Too Much Moisture!

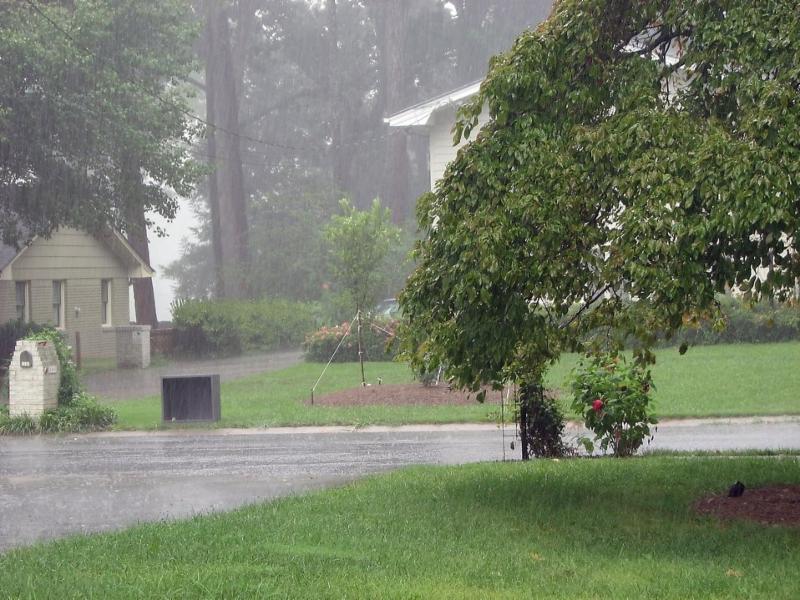
Recent weeks have given us more rain than usual, and unfortunately, just about any time we see excessive periods of rain, we see an increase in disease problems. Some problems are already showing up, others are likely to follow. Quick action is the key to minimizing problems that diseases bring with them. Here are a few tips to help you.
 
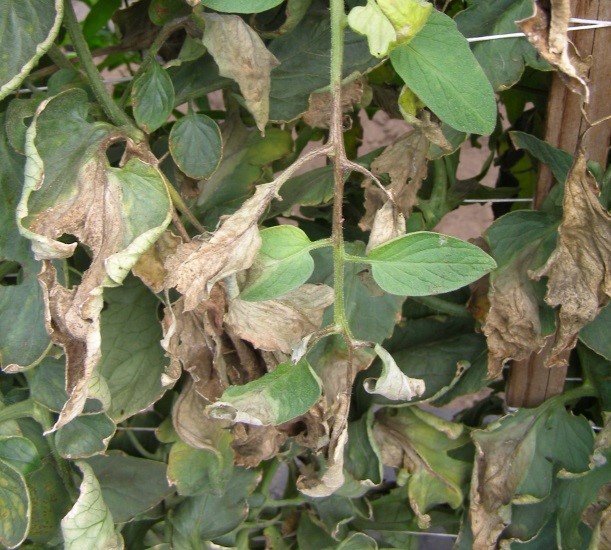
Tomatoes - One of the more common complaints about tomato plants is related to leaf diseases. Early Blight and Septoria Leaf Spot are common in our vegetable gardens and often end the tomato season prematurely.
Excessive moisture increases the occurrence of these diseases, so be prepared for some problems. Good disease control practices can help minimize disease problems. Start by making sure you mulch around your tomato plants. Mulching helps control the splashing of soil and the disease spores it contains onto the lower leaves. We like to use wheat straw, pine straw or alfalfa mulch. Preventive fungicides like Fertilome Broad Spectrum Fungicide can also be used.
 
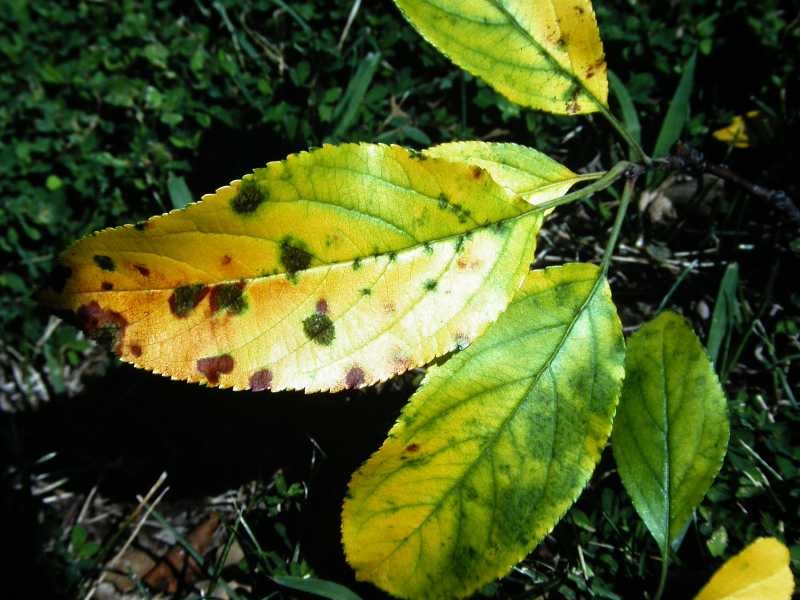
Fruit Trees - If you have done a good job keeping your fruit trees sprayed for leaf and fruit diseases already, don’t stop now! If you haven’t been applying anything, you may need to get started. We have several good disease control products for fruit trees. Keep in mind that not all products work on all fruit tree diseases, so it is important to make sure you are applying the right products to target the disease you’re are trying to control. Let us know what kind of fruit trees you have and we will help you select the right product.
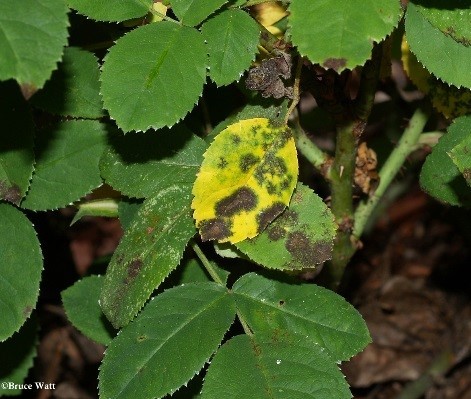
 
Roses - Black Spot and Powdery Mildew samples are already being brought in by customers. To reduce your chances of dealing with these diseases, start by planting your roses in places that receive lots of sun and good air movement.
Planting rose varieties that are naturally resistant to these diseases also helps. If you do find yourself dealing with these problems, fungicides will be needed. We have two by Fertilome that we use that provide good control, Liquid Systemic Fungicide and F-Stop.
 
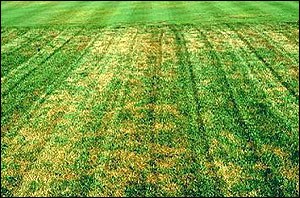
Lawns - Excessive moisture this time of the year often leads into the development of Brown Patch, a disease that creates irregular brown “patches” in tall fescue lawns and in severe cases, kills out areas of turf.
Warmer weather in the upcoming weeks will bring this one on. Although it is very common, most infections will only result in visual damage and eventually the lawn will recover. In years where the disease pressure is higher or in yards that are more prone to disease, prevention may be warranted. Use Fertilome F-Stop and start your applications before the disease gets started. That will be fairly soon. One other recommendation would be to avoiding excessive fertilizer this time of year.
If you have questions about what you are seeing on your plants, let us know. The quicker you identify problems and address them, the less damaging they will be. Bring in samples or email us pictures. We will do our best to get you the information you need and help you make the best decisions possible. You can email pictures and your questions to info@skinnergardenstore.com.

Slugs....Yuck!


As you may have noticed, we are having a very wet spring here in Northeast Kansas. While the yards are greening up and flowers are blooming, you may have also noticed a thriving slug population in your gardens and flower beds. What are these slimy things, and what do I do about them?
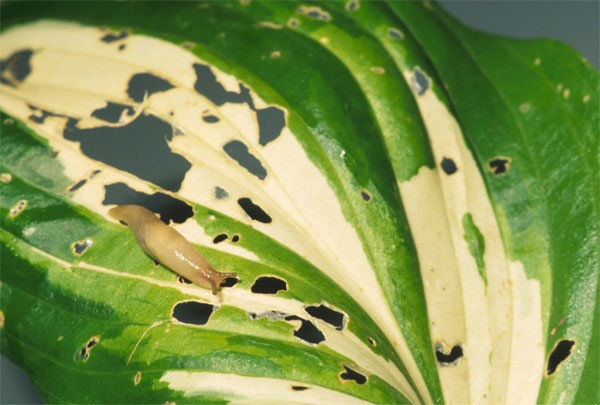
Slugs are mollusks, in the same family as oysters or clams, and are basically snails without a shell. These destructive pests have been known to devour your bulbs, vegetables, annuals, perennials, shrubs and more. One of their favorite snacks seems to be hostas. Thick leafed hostas tend to be a bit more slug resistant than thin leafed. Slugs are nocturnal and have the ability to destroy a seedling overnight. They hang out under mulch, in between boards and under various weeds and debris during the day, and require moisture to move around. This is why we see so many signs of them after a rain or during particularly humid nights. Slugs use a radula, a mouth covered in small teeth, to chew herbaceous plants, fruit on the ground and seedlings. The damage they cause is identifiable by the irregular shaped holes in the leaves they chew on.
There are several options for getting rid of slugs, and a few suggestions for reducing the risk of slug habitation. We offer Hi-Yield Slug and Snail Bait, Sluggo, and Diatomaceous Earth in our garden store. The Slug and Snail Bait temporarily paralyzes the slug until it dries out from the sun.   With Sluggo, the snail takes the bait to its hiding place and within 2-6 days, it dies. It can be used in organic garden, and is safe for use around kids and pets. Diatomaceous Earth is a natural approach to killing slugs. Also known as insect dust, it causes the slugs to dehydrate. Do not breathe it in as it can be harmful to your lungs. Each of these has a different approach to killing slugs, but should have the same results in the end. Some people have also found that collecting slugs and dropping them in soapy water or creating beer traps have also been effective for slug eradication.   On the other hand, watering in the morning as opposed to the evening can create less of an appealing environment for slugs. Also, removing as much debris and potential hiding places for slugs altogether is another approach.

Remember, while slugs will always be something that we have to deal with, there are effective ways to keep them from ruining all of our hard work in our gardens and flower beds. And as in most situations, the earlier we detect their presence, the sooner we can work to limit the damage they do.

Monday, May 16, 2016

Broadleaf Weeds - what do I do?

Broadleaf Weeds in My Lawn...What Do I Do?
Many homeowners find that all the great growth of spring also brings along with it a noticeable growth of weeds in the lawn...weeds that don’t look good and that are choking out the lawn.
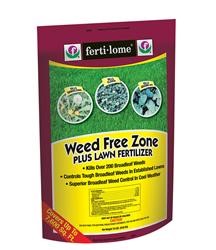
Although the absolute best time to tackle these broadleaf weeds is late in the fall, the next best time to nail them is right now...before they get any bigger! There’s more than one way to go at them, but two of the best approaches with spraying them with Fertilome Weed-Free Zone or treating the yard with a weed and feed combination called Weed-Free Zone Plus Lawn Food. Both contain a highly effective broadleaf weed killer and the weed and feed product has a great fertilizer formulation for late spring applications...like right now!
 
Broadleaf lawn weeds really aren’t that hard to get rid of if you use the right product and you do things right. If you’ve had limited success in the past, give these products a try and if you have any other questions, just let us know!

Growing Great Tomatoes

Growing Great Tomatoes
Mike’s Smart Pot Update
With the warm weather coming a bit sooner this year, many of us have been experiencing Spring Fever for some time now. Most of us have our own theories and rituals as to when the best time to plant certain garden varieties is, and this year, I’m sure some of those have been tested. After watching tomato after tomato, and pepper after pepper leave the store over the past couple of weeks, I finally decided that the time had come to get to planting in my Smart Pots.
I am experimenting with several sizes of Smart Pots this season, and have taken on the challenge of trying a few varieties of vegetables as well. I chose the 5, 10, and 20 gallon size pot, as well as the Big Bag Bed Jr. Raised Bed. After a busy Mother’s Day weekend, I made Monday night my planting night. I love to make salsa every year, so I wanted to incorporate some of the ingredients into my planting plans. I planted four varieties of spicy peppers and some candy onions in the Raised Bed. I also love refrigerator pickles, so I planted a patio cucumber in the 20 gallon pot. My wife is crazy about eggplant, so I planted an oriental express eggplant in the 10 gallon pot. Finally, on a whim, I planted fennel in the 5 gallon sized pot. We have never grown fennel, so it will be a new experience all together.
Nothing tastes as good as food you have grown yourself! I love to grow, share and talk about food with anyone and everyone.   As the pots take off, I will post progress pictures to accompany my experiences. Please feel free to contact me if you have any questions you may have about my experiences or yours with Smart Pots at miker@skinnergardenstore.com. And above all else, have fun!

-Mike Ray

Tuesday, May 3, 2016

What is that shrub?

What Is That Shrub?
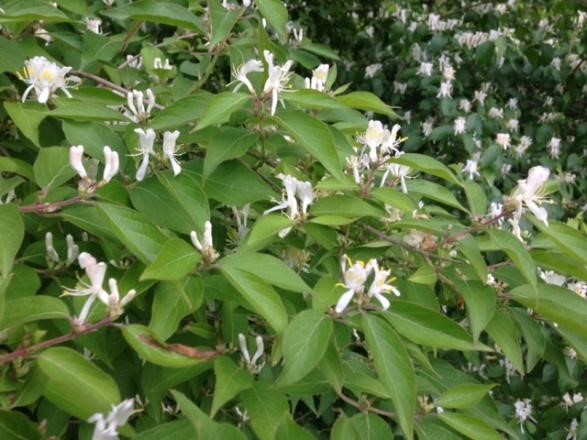
It's blooming now all over the place. You can find it crowding wooded areas, filling in the edges of the roadside, popping up volunteer throughout the yard, and even occasionally incorporated into the landscape. So what is plant we are talking about? It's Amur Honeysuckle.

Amur Honeysuckle (Lonicera maackii) was introduced by the New York Botanic Garden back in the late 1800's. It was widely planted for wildlife cover and to control soil erosion and has since escaped those areas and established itself into the native areas throughout much of the eastern U.S and on into the Great Plains where it now grows in rampant, choking out much of the native plant population in the process.
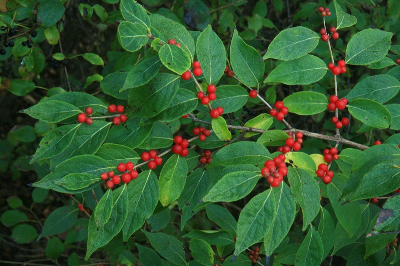
In our area, it will commonly be found taking over "natural" areas with its aggressive growth. It starts as a small sprout but quickly reaches greater size, becoming a large bushy plant of 10-15' in height, with older plants becoming small bushy trees of 20' or more. It leafs out very early in the spring, producing vigorous growth of bright green leaves and shoots. By this time of the year it is blooming, producing white to yellow flowers typical of honeysuckle that cover all portions of the plant. Small bright red fruits follow and by fall, plants are covered in these colorful fruits, soon to be eaten by birds and spread into new areas. There is a lot about this plant that is actually visually attractive, however the reality is that it's an ecological disaster.
Amur Honeysuckle is so aggressive that is quickly takes over areas, choking out the native growth in the process...native vegetation that native wildlife need to exist. It thrives in woodland areas, particularly along the timber's edge where it gets so thick it is almost impossible to penetrate. Soon it has choked out most naturally occurring growth, including the seedlings of the trees that make up our wooded areas. It also spreads readily into all areas of our yards and landscapes, and if left unchecked it will quickly engulf even the most established plantings. It is an aggressive menace that will choke out everything in its path.

Control and eradication is highly recommended. Young plants can be easily pulled from the ground, especially when the ground is soft and moist. Larger plants will need to be dug out or cut down and treated with stump killer...don't forget this important step! Untreated stumps will sprout back with a vengeance, very quickly regenerating new growth, making the problem even worse than before. Immediately after cutting the bush out, treat the fresh cut with Fertilome Cut Vine and Stump Killer to prevent this from happening. 

Sunday, April 17, 2016

Hydrangeas

Hydrangeas
Hydrangeas are one of our most popular groups of flowering shrubs, and they should be. Large flower clusters that bloom over a long period of time are a real eye catcher. And with so many great selections, it’s easy to find one you will like, but it can also get a little confusing. Here are a few insights to help make your selection process a little simpler.
We do four different kinds, or species, of hydrangeas. (We actually do a fifth species, but Climbing Hydrangea (Hydrangea anomala subsp. petiolaris) is a vine and won’t be discussed here.) From those four types we have dozens of different offerings. Each species has some general characteristics that make it a little different from the others, and knowing some of those differences is important.  

First, a few lessons in Hydrangea terminology.
We start with...fertile vs. sterile.
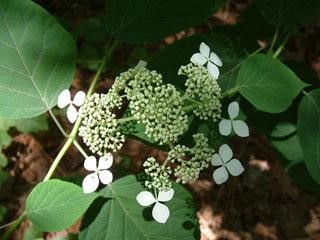
Hydrangea’s impressive blooms are made up of lots and lots of smaller flowers. Upon closer examination, on many selections you will often be able to find flowers of two different sizes within each floral cluster. Some will be larger, the size of a quarter or maybe a half dollar piece; others will be smaller, about ¼’ in diameter. The smaller ones are fertile flowers that produce seed. The larger more showy ones, are sterile. It’s these sterile flowers that intrigue gardeners. Most popular selections have floral clusters that contain very large percentages of sterile, or “showy” flowers, and in many cases, blossoms maybe made up entirely of sterile flowers.
Here’s the second set of terms...lacecap vs. mophead.
lacetop
In the wild, floral structures are made up of mostly fertile flowers, adorned with a few adorned with a small number of sterile showy flowers. In some species, the blossom is a rounded, flat-topped cluster, ringed by larger sterile flowers. This floral composition is commonly referred to a lacecap.
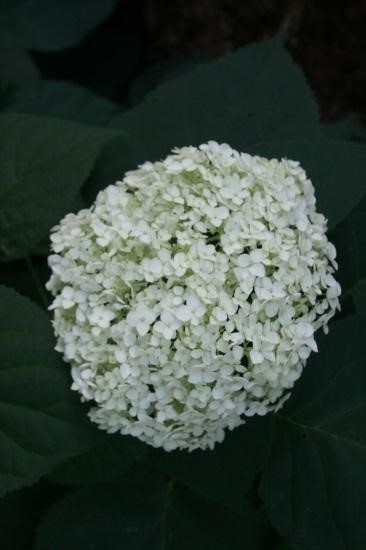
While attractive, this floral composition certainly doesn’t catch the eye nearly as much as many of today’s popular garden forms. Most of these selections have floral structures composed primarily of all sterile flowers, producing a large rounded floral structures commonly referred to as a mophead.
mophead
It’s easy to see why the mopheads are gardener favorites. They are stunning! Their large showy floral clusters make an amazing show.  

Now, a third set of terms...old wood vs. new wood.

The first two sets of terms were interesting if you want better understand what you are looking at or better understand floral description you may be reading, but this last set is really important if you want to make sure you know how to grow this garden beauty successfully.
Some flowering shrubs produce flowers from buds created the previous season. These buds remain dormant until the follow spring when they emerge to put on their show. These plants are said to bloom on “old wood”. Other flowering shrubs produce flowers from buds created in season on the current year’s new growth. These are blooming on “new wood”. Understanding this concept and knowing which plants bloom on old wood and which bloom on new wood can help prevent pruning mishaps. Prune a flowering shrub that blooms off of old wood during the late summer, fall, winter or early spring, and you will be pruning off flower buds, and no buds means no flowers. Conversely, things that bloom off new wood can be pruned aggressively during those times without any fear of cutting into flower production.
In the Hydrangea world we find both and know which is which saves a lot of frustration. Cut back a hydrangea that blooms on new wood during early spring cleanups...no problem. The new growth of the season creates all kinds of wonderful flowers and everyone is happy. Cut back a hydrangea that blooms off of old wood at the same times...say goodbye to your flowers. That doesn’t make for happy gardening.
Now for a quick look at the four Hydrangea species we grow.
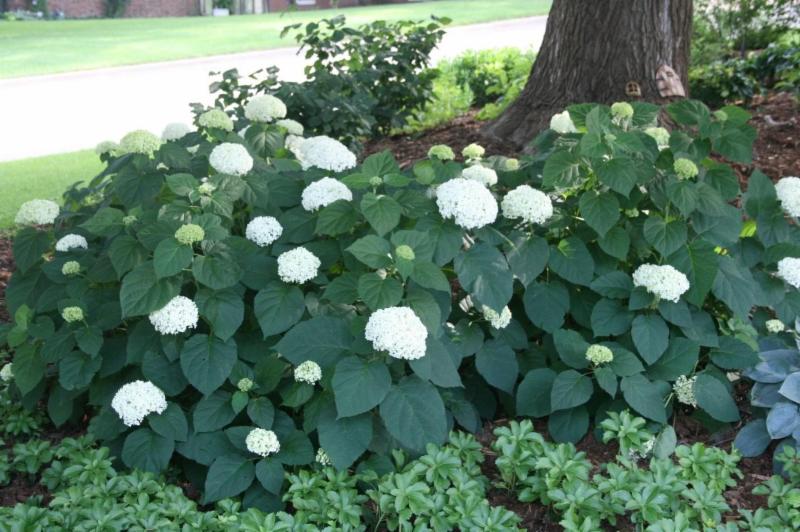
Smooth Hydrangea (H. arborescens) -This is one of the most dependable and easy to grow hydrangea species. It is a U.S. native, it is very hardy and it blooms reliably. It produces flowers off of new wood in the spring, so heavy pruning at the start of the season doesn’t bother it, in fact it’s recommended. Although the species generally produces lacecap-type flowers in the wild, these forms are rarely seen in gardens. Mophead selections are what really catch the gardener’s eye, and one of the best of those is a called ‘Annabelle’.
It produces large white floral clusters (up to 8-12” across!) and produces those in large numbers. This selection pretty much represents all of the Smooth Hydrangea found in the nursery trade. It grows about 3-5’ tall with a similar spread and does best in light shade. It looks best when pruned back hard each spring, taking last year’s stems back to 6-12” tall. It adds a nice brightness to shade gardens and is one of the easiest Hydrangeas to grow.
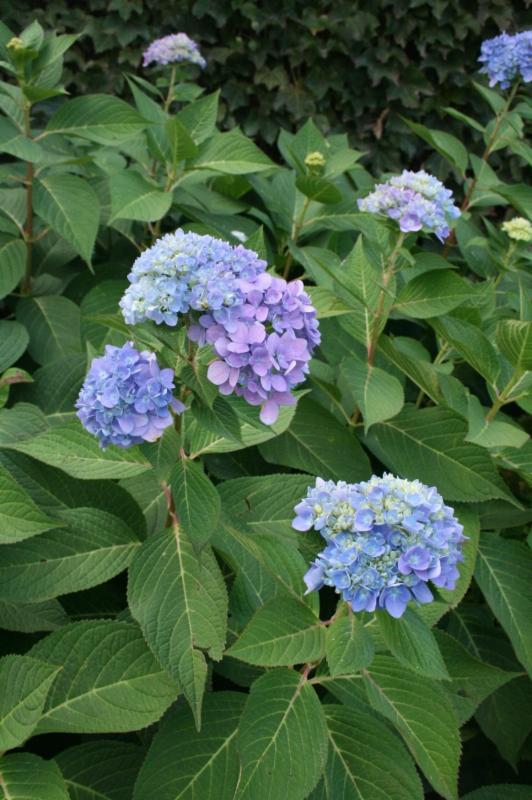
Bigleaf Hydrangea (H. macrophylla)-This native to Japan looks a lot like Smooth Hydrangea with one big exception, the color of the flowers. Instead of white, this species has flowers of pink, red, lavender, purple or blue borne in both lacecap and mophead floral stuctures. Many different forms exist offering a myriad of flower color, plant size and floral structure combinations, making their popularity understandable...in other parts of the country. Their use here is less common because of two major cultural problems, they are borderline winter hardy for us and they bloom off of old wood...and that’s not a good combination. If cold temperatures kill back topgrowth, then blooms the next season are scarce to no existent. That makes this species difficult to enjoy here in NE Kansas, and that has unfortunately prevented this species from being a major garden plant in our landscapes...until recently that is.
About 10 years ago, a new selection made its way into American gardens. Known as ‘Endless Summer’, this new form came by way of a chance discovery in the growing fields of a large wholesale grower. The original plant was observed blooming very late in the season, something this species doesn’t do. Upon further evaluation, it was found that this specific plant had the ability to bloom not only in the spring off of old wood, but again later in the season off the new wood. That almost guarantees floral production in climates like ours where this species tends to freeze back precious budwood each year! This new find, ultimately named ‘Endless Summer’, has given many gardens in colder areas the chance to enjoy the blooms of this species. However, in our hot dry climates, we have found that ‘Endless Summer’ isn’t very happy and overall success with this form has been less than what we had hoped for. A newer selection known as ‘BloomStruck’ is improving our chances for success. This selection is proving to be not only tougher, but also appears to have even more reliable blooming habits.

In general, this species gets about 3-5’ high and wide and does best if situated out of the hot afternoon sun. If will need regular watering during hot, dry summer months and most importantly, don’t prune it back! Remember, this species produces its spring flowers off of old wood.
One more interesting feature of this species is the ability of the flowers to change color. If you flowers are pink, you can make them blue by adding aluminum sulfate. If they are blue, and you’d like to make them pink, add limestone. It’s just like magic!
 
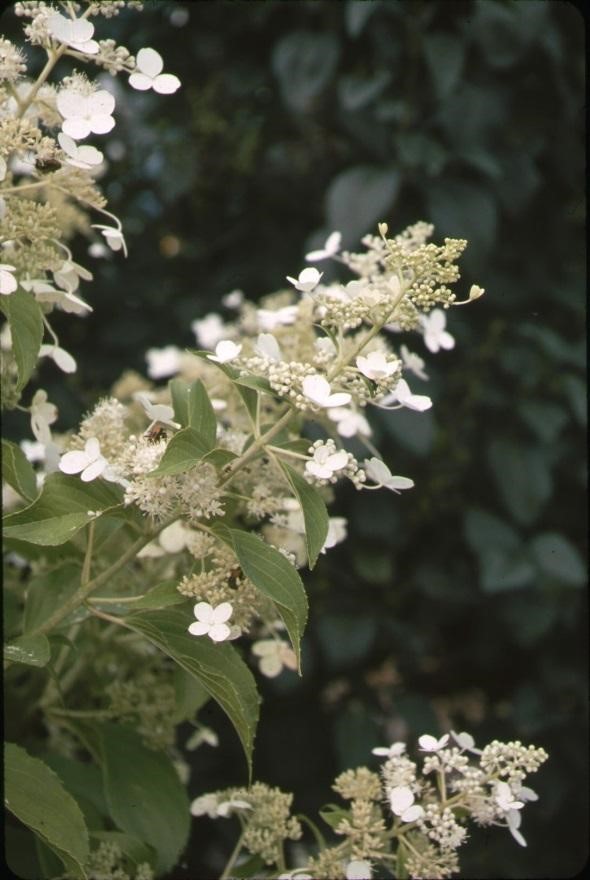
Panicle Hydrangea (H. paniculata)-An Asian species enjoyed by American gardeners for a very long time, this large shrub (6-10’ tall and wide), produces large cone-shaped panicles of pure white flowers (sorry, no blue here!), blooming off of the new wood of the season. That makes them hard to screw up! They typically bloom mid-summer, although there are forms that bloom as early as June (‘Quickfire’) and others that hit peak as late as September (‘Tardiva’). There are also a whole host of selections that offer different looking blooms (more or less sterile florets), larger or smaller panicles and more recently, dwarf sizes (3-5’ tall and wide). We carry a number of different selections and all make great plants. This hydrangea actually prefers more sun than the others, although light shade through the worst of the summer may be beneficial.
One interesting feature on this species is the occasional production of pink flowers. The flowers actually are still white, but towards the end of the bloom sequence, if the weather is right (cooler weather, especially at night), you will sometimes see the flowers fade into a rose-pink as they finish. Despite what you may read or hear about, this is unfortunately a fairly rare occurrence in our climate but it does occasionally happen, so enjoy when it does!
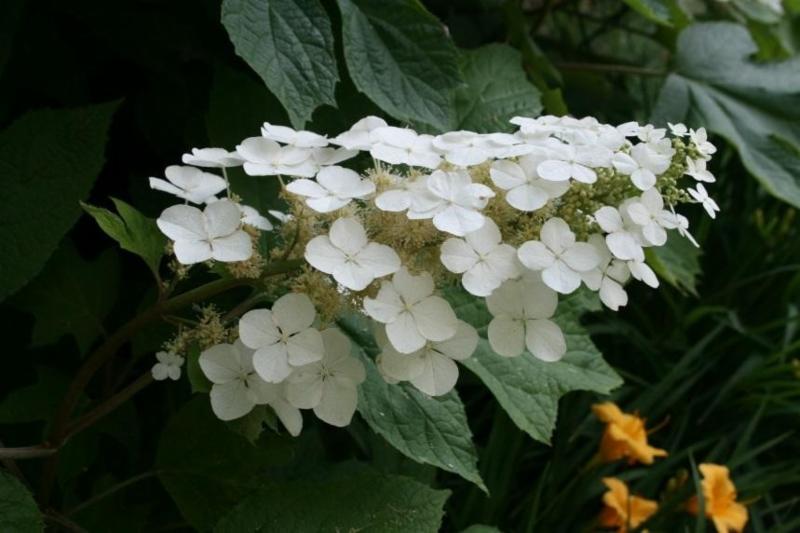
Oakleaf Hydrangea (H. quercifolia)-This is one of the best! This large American native shrub commonly grows to 6-8’ with a similar spread. It has large, oak-shaped leaves and large, cone-shaped flower clusters of pure white, much like Panicle Hydrangea. It blooms off of old wood, so don’t prune it during the dormant season! It has good winter hardiness and produces flowers reliably every year. The straight species is common grown in gardens and is impressive, but there are also many popular selections that offer variations in floral characteristics and variations in overall plant size, including many good dwarf forms. It does best when planted in areas that receive light shade, especially through the heat of the day.
 
One added plus to this species is great fall color. As cool weather sets in, leaves will change to red, orange, yellow and burgundy. It’s quite a show! This species can also have flowers that fade from white to rosy-pink towards the end of the blooming sequence, although this is rare for us in our climate as well.
There are many great hydrangeas to choose from and deciding between them may be difficult! Feel free to come out to the nursery and ask us some questions. We can show you some different options and give you some suggestions. If you want to check out all of the different Hydrangea offerings we have, you can follow this link to our online catalog to read more about them.


Have fun!

Tuesday, April 5, 2016

Growing Berries...Enjoying Berries!
There are so many things you can grow in your garden to enjoy on the dinner table. All kinds of fruits, nuts and vegetables are among the possibilities, but one of the favorites is always berries.
Part of the appeal is that there are some many different kind of berry producing plants that we can grow in our gardens, from small strawberry plants to sprawling grape vines. Sweet, juicy fruits growing right in your own garden...now that’s something to get excited about! Deciding which ones are right for you starts with asking yourself what you enjoy eating, and beyond that...it’s really just about the fun of growing them and the reward of success.
Here’s a list of popular berry plants you will find available at Skinner’s this spring. If you have questions about any of them, stop by and let us know. We are always glad to help.

Strawberries - Earliglow, Honeoye, Surecrop, Ozark Beauty
Blackberries - Chickasaw, Prime-Ark 45, Prime-Ark Freedom, Triple Crown
Red Raspberries - Encore, Heritage, Latham, Prelude, Raspberry Shortcake
Black Raspberries - Jewell
Gooseberries - Pixwell
Red Currants - Red Lake
Black Currants - Consort
Golden Currants (Clove Currant)
Grapes - Catawba, Cynthiana (Norton), Concord, Fredonia, Himrod, Mars, Niagara, Reliance, Venus  
Serviceberries - Regent
Blueberries - Bluecrop, Blueray, Jelly Bean, Nelson, Northsky
Elderberries - Adams, Bob Gordon, York
Kiwi - Issai

You can find more information about each of these varieties along with lots of other fruit and nut plants in "Edibles" section of our current catalog. Here’s a quick link for you.
Caring for Apples
If you grow apples, insect and disease control is important. Diseases like apple scab and cedar-apple rust can be devastating, and who likes biting into wormy apples...yuck! Knowing what to do and when to do it can be confusing, so here are some basic tips.
Insect and disease problems need to be prevented, not cured. It’s kind of like when you use sunscreen. You have to apply it before you go out in the sun, not after you get the sunburn. That means protective sprays for you apple trees need to be applied before a problem develops, not afterwards.
One of the biggest insect problems on apples is coddling moth. These small moths lay eggs on or near newly developing fruits and upon hatching, the young larvae bore into the fruits where they feed on the seeds and the surrounding flesh leaving fruits less than desirable. Control begins shortly after spring blooms fade. Start applying protective sprays using Fertilome Borer, Bagworm and Tent Caterpillar Spray (Spinosad), Hi-Yield Malathion or Hi-Yield Lawn, Garden, Pet and Livestock Insect Control following label directions. It is very important that insect control sprays not be applied until after blooming has finished to avoid damaging critically important pollinator populations.
Disease control starts as soon as leaves appear. Apple scab and cedar-apple rust both have the potential to start infecting leaves and fruits very early in the season and can continue to cause problems through much of the spring. Use Fertilome F-Stop according to label directions to prevent damage. Make sure to make thorough applications, covering both the top and bottom sides of the leaves, and penetrating into the center of the tree’s canopy as well.
By June, consider switching to a combination product called Bonide Fruit Tree Spray. This product combines both a fungicide and an insect control and works well for late spring/early summer issues.

Remember to always follow label directions, paying close attention to mixing rates, spraying intervals and harvest restrictions. As always, if you have questions, please don’t hesitate to ask us.
Raised Bed Gardening
As the snow melts, and the Redbuds start to bloom, many people get a full on case of Spring Fever.  As the ground temperature begins to warm up, raised bed gardening allows for a quicker way to curb the need to see green. 
Whether it’s cleaning up from last year or creating a new design from scratch, several key factors should be considered when planning for a raised bed garden.   Eradicate existing vegetation, and turn the ground every time before planting.  Add high quality organic matter every time you turn the turn the ground.  Do not use landscape fabric under raised beds, as this limits root growth and prevents the added soil from blending with the existing soil. 
For new raised beds, Soil Mender’s Raised Bed Mix is an excellent choice.  This unique blend  provides a choice  mix of topsoil, cotton burr compost, humate, coir and several other all-natural and organic  ingredients.   When used with a natural fertilizer such as Yum Yum Mix or a traditional fertilizer like Fertilome’s Gardener’s Special, everything necessary for a healthy and vibrant garden will be available to the first planting of the new garden.
When preparing an established garden for a new season, Soil Mender’s Garden Soil Builder helps replenish nutrients with vital organic and biological material.  This also has a naturally occurring  and measurable amount of fertilizer, and alfalfa meal containing  Triacontanol.  These both contribute to bigger and better plants. 

Finally, add high quality compost after every crop, not just every season.  Minerals and nutrients used during each crop need to be replenished in order to ensure that they are present each and every time a new planting takes place.  Some people choose to plant cover crops such as rye, turnips, buckwheat or peas and oats.  Whatever the choice, the health of the soil directly contributes to the health of the plants.   

Sunday, March 20, 2016

Growing Your Own Fruit 
Spring is as important time for setting out new fruit trees. Early spring planting gives young new fruit trees time to get a head start in their new home before hot summer weather shows up. That increases your new tree’s chances for success.
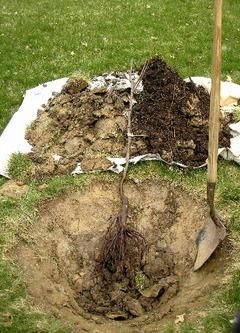
Variety selection is generally at its best, including options with both container grown trees and something known as bare root trees. Most people are probably familiar with container grown trees. Simply put, they are trees growing in a pot. Given proper care, we can have container grown fruit trees available 365 days a year...and generally we do. Bare root fruit trees are a little different.
That term, “bare root”, actually does a pretty good job of describing what we are talking about. These trees have been dug out of the ground during the winter and all excess soil is removed from their roots. They actually now have bare roots. They are kept dormant by then placing them in them in large coolers that keep the temperatures just above freezing, mimicking winter-like conditions. Throughout their storage time, conditions are carefully monitored and the exposed roots are water on a regular basis to keep them from drying out.

We do both at Skinner’s.
We have container grown fruit trees in stock, off and on during most of the year. Bare root fruit trees however, are a spring only item. Eventually, even trees in a cooler begin to sense spring and need to be planted out.
Both types make for good trees to plant out.  Our bare root trees are usually only about one year younger than their potted counterpart. They are generally considerably cheaper than the potted version, and because there is no pot full of soil, they are also easier to haul home. Planting and post-planting care is essentially the same for both as is overall transplant success.
More important that which type you are going to plant, is what varieties you are going to choose ton include in your home orchard? There many different types of fruit trees we can grow here, including apples, peaches, pears, cherries, nectarines, apricots and plums as well as other lesser known fruit trees and even nut trees. All have pros and cons that should be considered as well as cultural information that is important for success. We can help you work out that information. There are a couple of good links below that may help as well. One is to a K-State Extension publication that goes through some of the basics of fruit gardening. The other is a link to the “Edible” section of our catalog. It lists and describes a long list of tasty fruit tree choices.
Now, all you need to do is decide what kind of fruit you want to enjoy. Have fun!
  

Sunday, March 6, 2016

Early Spring Planting
The early warm up we’ve been enjoying has a lot of people asking us if it is okay to start planting. The answer is….absolutely!
Although colder weather will more than likely return again a time or two, that doesn’t create a problem when it comes to planting hardy plants. Go ahead and start planting trees and shrubs, feel free to start lining out the early vegetable garden, celebrate early spring with some colorful pansies in you front porch pots and get those bare spots in lawn filled in with some fresh seed. We are slowly starting to move our nursery stock back out on to the sales lot, but there are a lot of plants to be moved and it takes some time. If you aren’t finding what you’re looking for, just let us know. Chances are pretty good we have what you are looking for still stashed in one of our overwintering houses.
Inside, our bare root cooler is up and running full force and we’ve received most of the things we keep in there during the early spring. Fruit trees, seed potatoes, onions, asparagus and strawberries are all in and the last few odds and ends are expected any day now. These should all be planted out early in the spring for best results, come get yours while the supplies are good!

Early spring is great time to plant. Take advantage of the early spring weather and get some projects done!

Saturday, January 30, 2016

Bare Root Fruit Trees


One of the best ways to plant fruit trees in the springtime is bare root. Bare root is a strange term to most people, but it means pretty much what it sounds like...the roots are bare.
That may seem weird to most folks, and it might even a little scary to some, but you can feel confident that when handled properly, transplanting fruit trees bare root is the preferred way to go. The key to that statement is “handled properly”. Bare root fruit trees (or any other bare root plants for that matter) have no soil on their roots. Their roots are very susceptible to drying out, and when that happens, plants die. We have refrigeration facilities to hold and store our fruit trees properly. We take time on a daily basis to make sure they are staying dormant and their roots are being kept moist. When you come in to make your purchase, will package your purchase up to protect it until you get it home. The only time these trees aren’t in refrigeration is on their ride home with you. Don’t get these confused with the dried up bundles of near dead plants you walk past as you enter a lot of the big stores or you maybe have received through mail order in the past.
We have them available for only a few months each spring and then after that, they are “out of season” until next year. They transplant easier (usually that means more successfully), they are less awkward to haul home and best yet they are cheaper!
And don’t think bare root automatically means the trees will be small and puny. Most of the trees were sell are 2-3 years old, allowing for a nice starting height and usually a good set of branches.
We don’t have them in yet, but it won’t be long, hopefully before the end of February. If you are thinking you would like have some fruit trees growing in the yard, keep bare root in mind!
Click here to connect to the Edible Section of our catalog. There are a few variety changes that will be made to it in the upcoming weeks, but it is a pretty good representation of the kinds of fruit trees, as well as other edible crops we have available both container grown and bare root at Skinner’s.

Thursday, January 28, 2016

"Thymely" Advice...Winter Pruning


Now that we are approaching the later part of winter, it’s time to think about doing pruning projects before spring gets here. It’s easier to see what you are doing when there aren’t a lot of leaves in the way, so take advantage of a nice afternoon and get some work done!
Here are a few tips to help you out.
  • As a general rule, try not to prune early spring flowering shrubs until after they have bloomed this spring. Shrubs that bloom early have dormant flower buds already formed on the overwintering branches. Pruning now removes the flowers you want to be enjoying in the months to come. On the other hand, if your shrub doesn’t bloom until summer, or doesn’t really have showy flowers to begin with go ahead and prune it now. This year’s flowers will form on the new growth that emerges.
  • Remove broken, diseased or damaged branches first, then prune branches out to help direct growth, control size as needed.
  • Learn where and how to make a proper pruning cut and always use sharp pruning tools that will do the job properly. Hand pruners and loppers are for smaller twigs and branches and pruning saws are for larger branches.
  • Never use pruning paints or sealers. These products were once thought to help protect trees when large cuts had to be made. We now know that these products are cosmetic at best and in many cases, they actually slow down the healing process and increase the likelihood of rot and decay setting into exposed branch tissues. Just learn how to make proper cuts and let your tree do the rest.
  • Unless you really want your plants getting big, most shrub roses will benefit from a hard pruning each spring. In most cases it’s safe to remove around 2/3’s of the old top growth. Then thin and the remaining branches as needed.
  • Most clematis should be pruned to about 12-18” tall each spring. Do this before the new growth starts and remove all of the pruned off branches from your trellis.
We have lots of great pruning tools at Skinner’s. If you need help figuring out what you need or what style or type of pruner or saw would be best for you, just come on out and we’ll give you some recommendations.